Controls Settings
Help the Community
Your custom input configurations are saved locally on your computer. If you have created a solid profile for a specific joystick or HOTAS, sharing it allows other players to use a true “Plug & Play” setup without manual configuration.
File Location:
You can find your saved profiles here:
%AppData%\Razar\FPS2\JoysticksFile Naming Format:
The game generates a unique configuration file for each device based on its USB Vendor ID (VID) and Product ID (PID).
(Example: VID_045E_PID_02FF.json)
How to Submit:
- Discord: Simply drag and drop your .json file into our community Discord channel.
- GitHub: If you have a GitHub account, you can simply open a new Issue on our repository and attach your file there.
1. Getting Started
To configure your controls, head over to the Settings menu and select the Controls tab.
At the top of the screen, you will find the Device Selector.
- Select your hardware: Click the dropdown list to choose the specific joystick, throttle, or gamepad you want to set up.
- Don’t see your device? Please ensure it was plugged in before you launched the game. If it’s still missing, try restarting the game. A restart may be required to properly detect newly connected hardware.
2. Binding Your Keys
You will see a list of actions (like Yaw, Pitch, etc.). To the right of each action is a Slot.
- To Bind: Click the button that says Empty (or the current key name).It will enter listening mode (“…”). Now, simply move the axis or press the button you want to use.
- To Unbind: Click the “X” button next to the binding slot.
3. Input Modes
This is where our system gets powerful. To the left of the binding slot, you might see a dropdown menu saying Analog, Digital, or Analog as Digital.
This tells the plane how to interpret your input.
Analog
Best for: Joysticks, Rudders.
- The game expects a continuous axis input (typically in the range -1.0 to 1.0).
- Use this for Pitch, Roll, Yaw, and Look.
Digital (On/Off)
Best for: Buttons, Switches, Keys.
- The game expects a binary input (Pressed / Released).
- Use this for Flaps, Gear, Camera switching.
- Note: If you select this mode, you won’t be able to bind a joystick axis here.
Analog as Digital (Incremental Mode)
Best for: Throttle, Pitch Trim – any control that should hold its position after adjustment.
This mode converts a physical axis into incremental control.
Instead of directly mapping the axis position to the in-game value, the axis controls the rate of change:
- Moving the axis in one direction increases the value.
- Moving it in the opposite direction decreases the value.
- Returning the axis to neutral stops the change.
- The value remains at its last position.
This allows you to use a spring-centered stick or mini-stick to control systems that normally require a non-centered lever.
How it works: When you select this, you get two slots:
- [-] Decrease: Reduces the value (e.g., Lower Throttle, Trim Down).
- Important: In most cases, you will need to enable Invert on the [-] slot so that the physical axis direction correctly corresponds to decreasing the value.
- [+] Increase: Raises the value (e.g., Increase Throttle, Trim Up).
The positive and negative axis directions are internally treated as independent digital-style triggers.
4. Fine Tuning (“Modifiers”)
- Deadzone:
- Typical values range from 0.05 to 0.10 depending on hardware quality.
- Hardware Chord:
- Assigns a required modifier button to this action. The input will only be registered when the specified Modifier (e.g., Modifier_LB or Modifier_RB) is held down simultaneously.
- Usage: Allows mapping multiple functions to a single physical control.
- Example: Map your Left Stick Y-Axis to Pitch normally. Then, map the same Y-Axis to Pitch Trim but add Modifier_RB as a Hardware Chord. Now, moving the stick normally controls pitch, but holding RB + Stick adjusts your trim.
- Invert:
- Reverses the polarity of the input. Use this if the control surface moves in the opposite direction relative to your physical input.
- Common use case: Aircraft pitch axis often needs inversion depending on player preference or hardware orientation.
- Normalize Range:
- Remaps a bi-directional axis range (-1.0 to 1.0) into a uni-directional output range (0.0 to 1.0).
- Usage: Essential when mapping a standard joystick axis or slider to Throttle. It ensures that the full physical range of movement corresponds to 0% to 100% thrust, rather than having “Idle” at the center position or “50%” at the bottom.
- Scalar:
- Multiplies the raw analog input value by a scalar factor between 0 and 1. This proportionally reduces the effective output range, effectively lowering the sensitivity of the axis.
- Typical values are 0.5 for half sensitivity, 0.75 for a mild reduction, or 1.0 for no change (modifier omitted). This modifier does not affect digital (boolean) inputs.
- Example: Map your Left Stick X-Axis to Roll. If the roll response feels too aggressive, add a Scalar modifier with a value of 0.6. The output range will then become –0.6 to +0.6 instead of –1.0 to +1.0, reducing roll sensitivity while preserving the full physical stick travel.
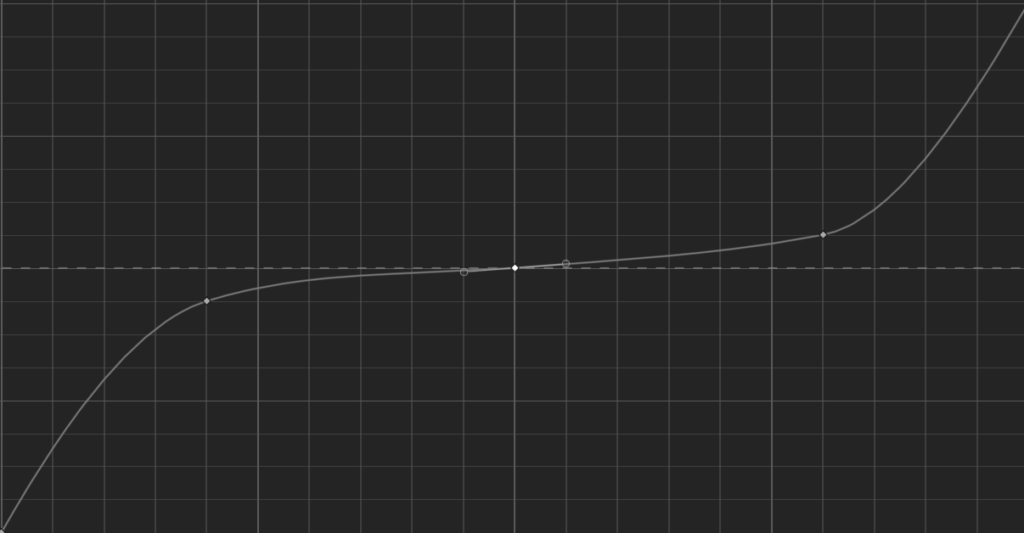
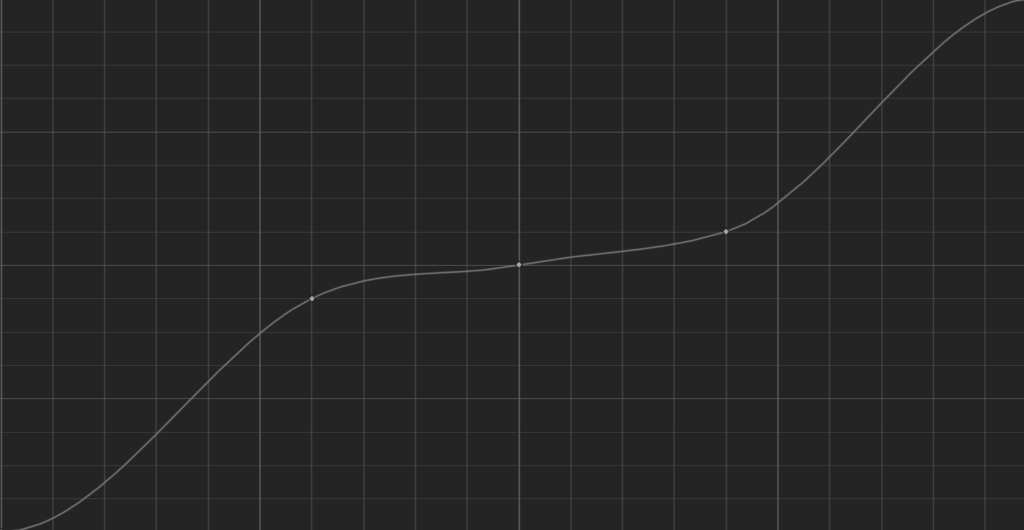
- Response Curve:
Default:
Default1:
5. Save & Share
Don’t forget to click Save & Apply at the bottom!
This writes your configuration file to disk and immediately updates the active control profile used by the flight model.